Taking care of orchids
March 2022
This article is about Phalaenopsis genus orchids, I’m not familiar with other types of orchids.
The setup
All you need is an orchid, a plastic pot and some bark chips. I have two orchids - a very expensive one from a specialist breeder that I acquired through a botanical garden, and a ridiculously cheap one that I got from a supermarket. After more than 5 years, there is absolutely no difference between them.
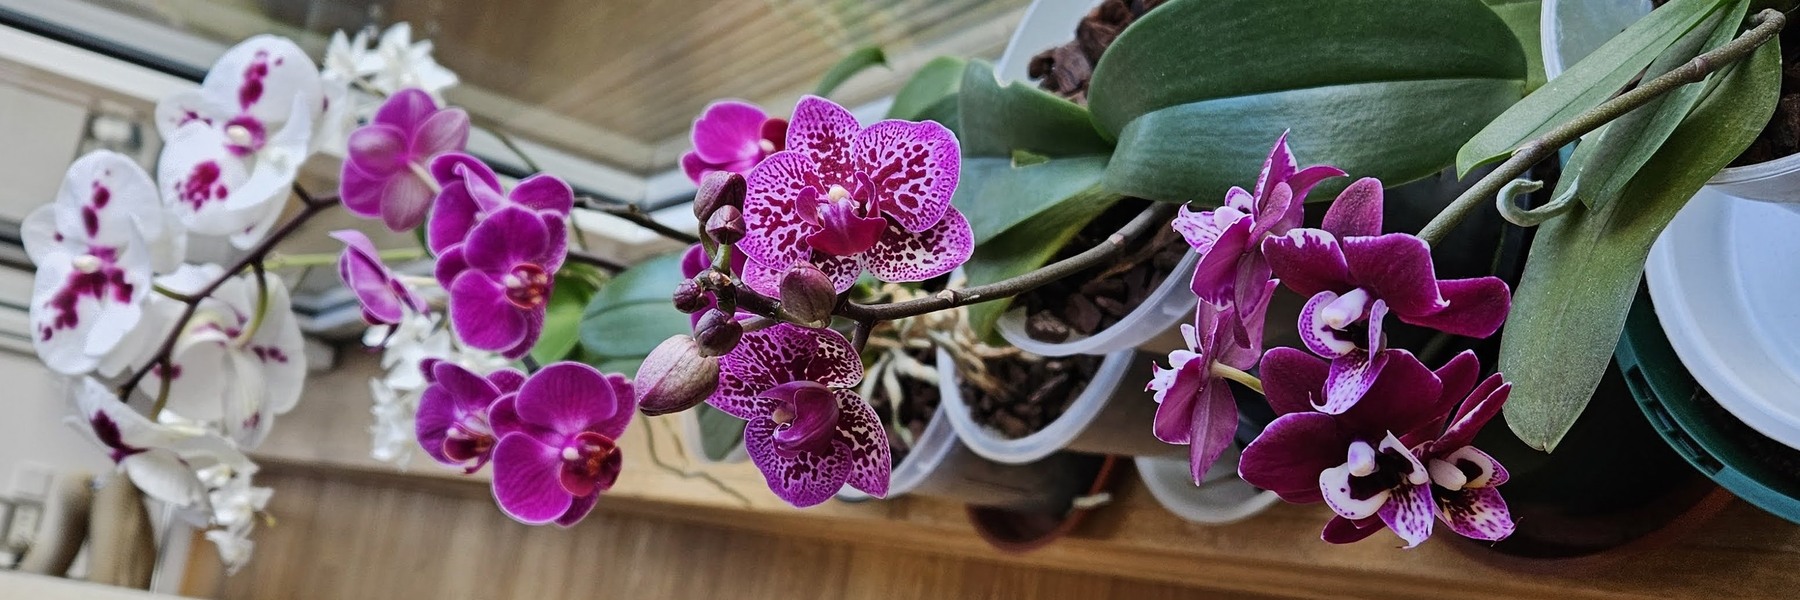
The first thing to do is to memorise how an orchid looks like when it’s happy and healthy - glossy leaves with no wrinkles, and dry plump roots. If you start with a one dollar half-dead orchid from a supermarket, look at orchids in expensive flower shops for a reference.
An ideal pot is transparent and has many holes around the bottom and the sides. The holes allow for good air circulation around the roots. A transparent pot allows you to notice any root damage early and fix the problem before it is too late. So a cheap plastic pot is the best one. Many shops will try to sell you beautiful outer pots to hide the ugly plastic one, but they severely limit the air circulation around the roots, so are not ideal for orchids.
If you absolutely cannot find a plastic pot with holes around the sides, you can make one yourself. You’ll need a flimsy plastic flower pot, a gas stove, an allen key; and you’ll need to be very careful not to injure yourself. Heat up the alan key on the flame and use it to puncture holes in the sides of the pot, the more the better.
Watering
To water the orchid, place it under an open tap. You’ll notice how the pot starts to feel heavy as the bark chips get soaked in water. Once the pot is as heavy as it gets, turn off the tap and tip the pot in all directions to drain the pot. Leave the orchid for ten minutes and then drain again to ensure that no water is left at the bottom of the pot or in the pot saucer.
Water the orchid every couple of weeks, more frequently if it’s hot. If the leaves become limp and develop wrinkles and roots look thinner than before, your orchid is dehydrated and you must water it immediately. If the roots look a bit slimy, stop watering the orchid until they return to their normal dry look. It’s best to water the orchid in the morning, to allow the roots to dry out during the warmer part of the day.
Adult orchids tend to have about the same number of leaves throughout their lives. As new leaves grow the old ones will yellow and fall off - that is completely normal. But if more than two leaves are starting to yellow at the same time that is a sign that your orchid is not happy.
Repotting
When a lot of the roots dangle outside of the pot, it’s time to repot your orchid. Wait for the orchid to finish flowering before repotting it. Gently pull the orchid out of the pot and gently remove bark chips stuck to the roots. Gently cut off dead bits of the roots, but don’t trim the healthy roots that have juicy tips and are clearly growing.
Fit the roots of the orchid back into the same pot or into a new slightly larger pot; then fill the pot with bark chips. If the bark chips are old and falling apart, they’ll need replacing; otherwise reuse the ones you have.
Flowering
Be especially nice to your orchid during flowering and avoid dehydrating it. In the shops they often attach flowering stems to support sticks, but I find it unnecessary unless you are planning to travel with the orchid. It’s really easy to break off the new fragile flowering stems when attaching them to a rigid stick.
Once the flowers have fallen off after flowering, don’t cut off the flowering stems, as they are likely to produce more flowers next time. The flowering stems that have dried out and turned brown can be safely cut off.
Enjoy your orchids!